so today we will be looking at how to set up the ultimate Anime downloading and Streaming setup using qBittorrent for downloading, MedUSA and Prowlarr for tracking, Jellyfin for streaming
DISCLAIMER:
This Tutorial requires a little bit of linux knowledge on how filesystem/mounts works, and a little common sense
Why 4 Softwares?
most people is done after qBittorrent but why add more complexity?
with this system new episode will be downloaded automatically and managed to properly go into the folder they belong
Part I, Hardware
this setup will run on basically anything from an old Gen4 I3 to the latest and greatest Epyc processor, you just need at least 8GB of memory to prevent things from crashing because Linux can and will crash when there is not enough memory, and you’ll need a lot of storage a TB is enough but you’re going to need more, trust me I’ve gone through 4TB in a month
Part II, Base
for OS, anything linux based will work (preferly Debian based, TrueNAS Scale, and Ubuntu will work with this tutorial)
in this case I’ll be using TrueNAS Scale because I partly wanted to try it and Ubuntu is not the greatest for RAID array, and don’t worry I wont be going in depth for zfs and all that, this instruction will be for normal Linux people, for TrueNAS you’ll need to improvise, or if there is that many request I’ll make another one for TrueNAS
Part III, Prep
get docker installed, this will be the only thing we will need, for TrueNAS it is already installed in this case so we don’t have to worry if you’re using Ubuntu then install it, and for the love of god DONT use the snap version of docker, it sucks and I don’t recommend it
we’re also going to install Portainer CE for easy management of containers using the official instructions
docker run -d \
-p 8000:8000 \
-p 9443:9443 \
--name portainer \
--restart=always \
-v /var/run/docker.sock:/var/run/docker.sock \
-v portainer_data:/data \
portainer/portainer-ce:latest
Once this is done visit <server is>:9443 and set it up
* you might get HTTPS Certificate error, you can ignore it
Part IV, Jellyfin
to setup jellyfin we’re going to use the official Jellyfin Docker container following the official instructions
make sure to change the path to the files
docker run -d \
-v /mnt/Data/Jellyfin/config:/config \
-v /mnt/Data/Jellyfin/cache:/cache \
-v /mnt/Data/Jellyfin/media:/media \
--net=host \
jellyfin/jellyfin:latest
* if you’re using TrueNAS run the container via the apps tab instead use the above docker command for reference on what to set
next, we’re going to log into jellyfin and set it up, I’m not going to show the steps but it shouldn’t be hard to figure out
it should prompt you to create a collection, for anime, the type is “Shows” and point it to your anime folder
Part V, Downloader
for downloading we’re going to use qBittorrent, since it’s easy and the image we’re using today has a cool interface, head over to Hotio website for more info
docker run --rm \
    --name qbittorrent \
    -p 8080:8080 \
    -e PUID=1000 \
    -e PGID=1000 \
    -e UMASK=002 \
    -e TZ="Etc/UTC" \
    -v /<host_folder_config>:/config \
    -v /<host_data_folder>:/downloads \
    cr.hotio.dev/hotio/qbittorrent
the default credentials for login are admin/adminadmin for admin and password
to enable the vuetorrent web interface head into the settings webUI and scroll down to use alternative webUI and check it then click save
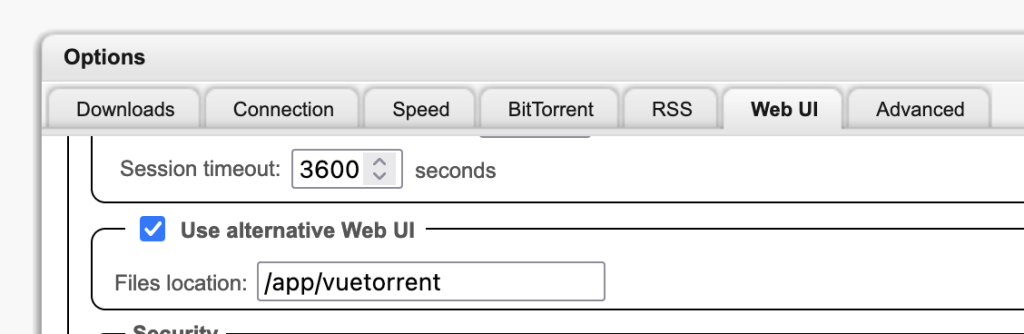
it will refresh once and you’ll be dropped off at the new shiny UI which now has Dark mode🎉
now head over to the “Downloads” tab scroll down
and check “Append .!qb to incomplete files” this will make sure medUSA won’t try to process file that is currently downloading

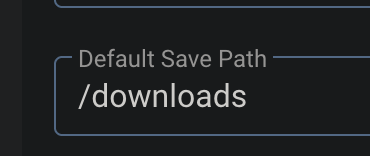
and scroll down to “default download path” and change it to “/downloads”
Changing the password is recommended, so do it now
That’s it for qBittorrent, next let’s move on to the last part
Part VI, Tracking
so we’ve come to the last part, this part is optional, you can use RSS for weekly releases but for proper tracking, we will use 2 additional containers for this, Prowlarr for talking to our indexes and MedUSA for tracking episodes and sending download commands, this allows you to download episodes without going to other sites like nyaa, it also allows for replacing encodes automatically when it finds a better one
FAQ: Why MedUSA, how is it better than Sonarr
I personally find MedUSA works better for anime so this is what I’m currently using to track my episodes
VI-1 Prowlarr
For this, we’re going to use the linuxserver docker image
from LinuxServer.io
docker run -d \
  --name=prowlarr \
  -e PUID=1000 \
  -e PGID=1000 \
  -e TZ=Etc/UTC \
  -p 9696:9696 \
  -v /<config path>:/config \
  -v /<data path>:/data \
  --name=prowlarr
  --restart unless-stopped \
  lscr.io/linuxserver/prowlarr:latest
* if you’re using TrueNAS run the container via the apps tab instead use the above docker command for reference on what to set
now visit <your server IP>:9696 to see if the UI is reachable
once you set it up click on “add new indexer” and add nyaa to your indexer list, if you use SubsPlease for weekly releases add their indexer to the list too, if you did it properly your web interface will look like this

next let’s move on to MedUSA
VI-2 MedUSA
this is a little complicated, took me a while to set it up properly so let’s first set up the container, we’re going to use the official PyMedUSA docker image
*Change the path to match yours
docker run -d \
  --name=medusa \
  -e PUID=1000 \
  -e PGID=1000 \
  -e TZ=Etc/etc \
  -p 8081:8081 \
  -v /mnt/Data/Containers/MedUSA:/config \
  -v /mnt/Data/Jellyfin:/data \
  --restart unless-stopped \
  pymedusa/medusa
* if you’re using TrueNAS run the container via the apps tab instead use the above docker command for reference on what to setalso with medusa if you wanted to use hardlink mount the data directory to the parent directory of the downloads folder and jellyfin media folderhardlink will not work across drives and mount so be careful
now let the container prep and once its up we should be able to visit the web interface to set it up
head over to <server IP>:8081 it should bring you to the default location
now we have a few things to setup
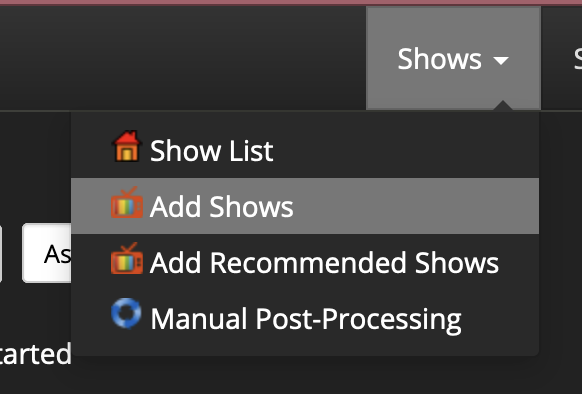
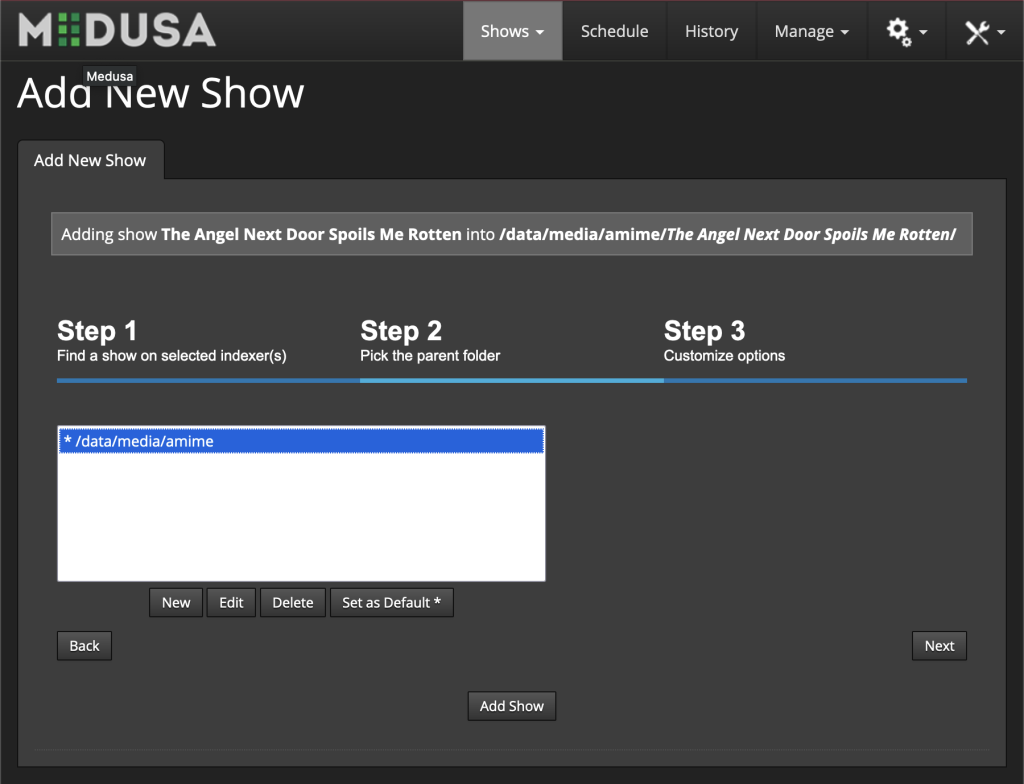
from the top click “shows” and “add shows”
click on “add existing shows” and from “manage directories” click new, this will bring up a UI for us to pick a folder, pick the folder you use for jellyfin library and click “ok”
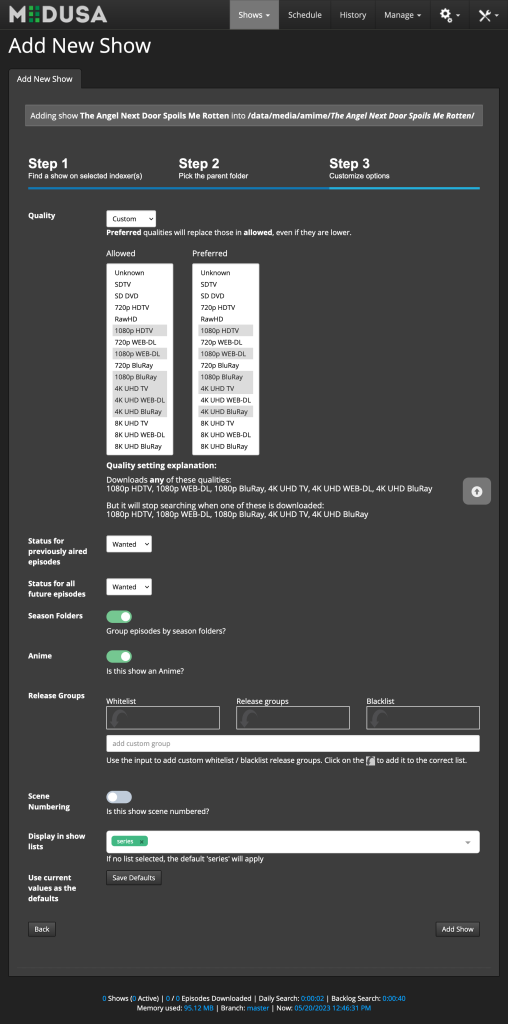
now head over to the “customize options” tab and set the allowed resolution and preferred, this will make sure Medusa only put the allowed resolution in your library, for me I set mine to this
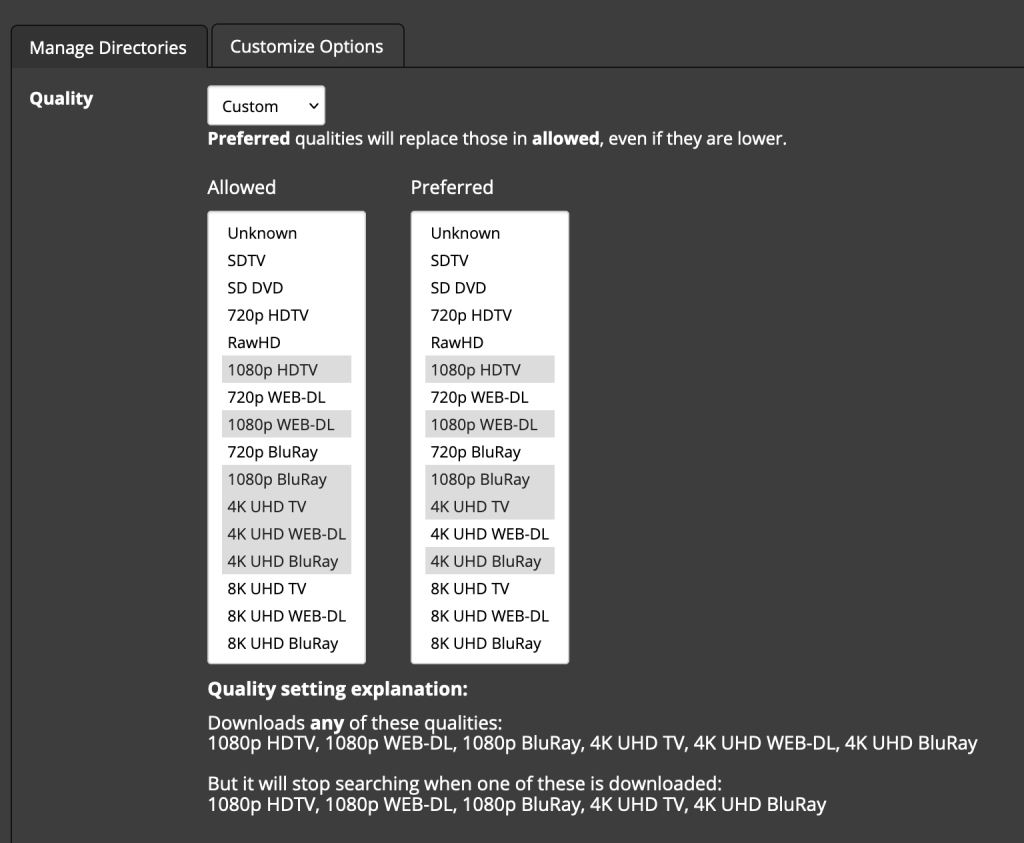
and configure how you want to set it up and then click save at the bottom of the box
now head over to the “gear” tab and click on “search providers” this is where we will set up our search providers
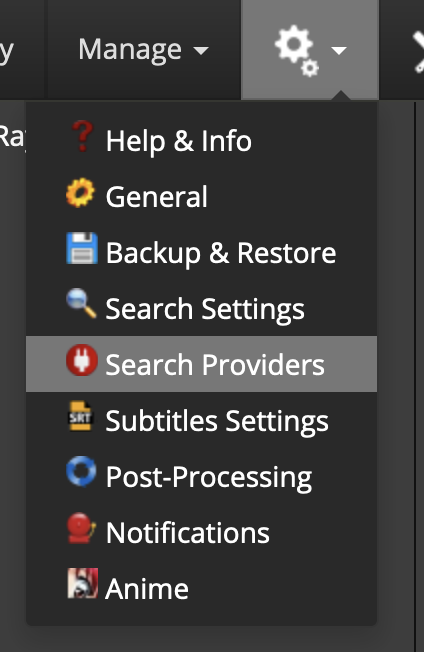
now go to “configure custom prowlarr providers”
for “Prowlarr URL” put in HTTP://<your server IP>:<exposed prowlarr UI port>
for the API key we’re going to get that from prowlarr login to prowlarr and go to the settings on the right hand side, click on “general” and copy the API key

put that 2 into Medusa and click the 3 buttons in order, save, test, then get providers if you done it properly this is how it should looks like
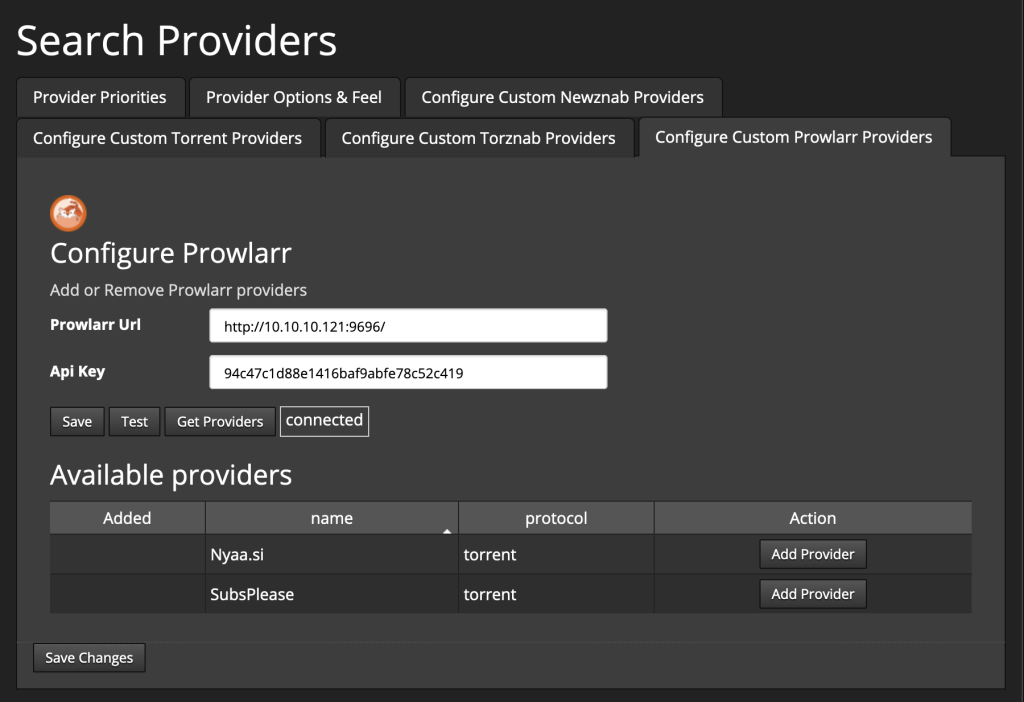
now on the provider(s) that shows up click on “add provider” on both and then click “save changes”
now go to “Configure Torznab Providers” and select one of your providers, then on categories delete everything and add “5070” this is what medusa identifies as anime this will allows you to use it as indexer for anime, in the end it should looks something like this
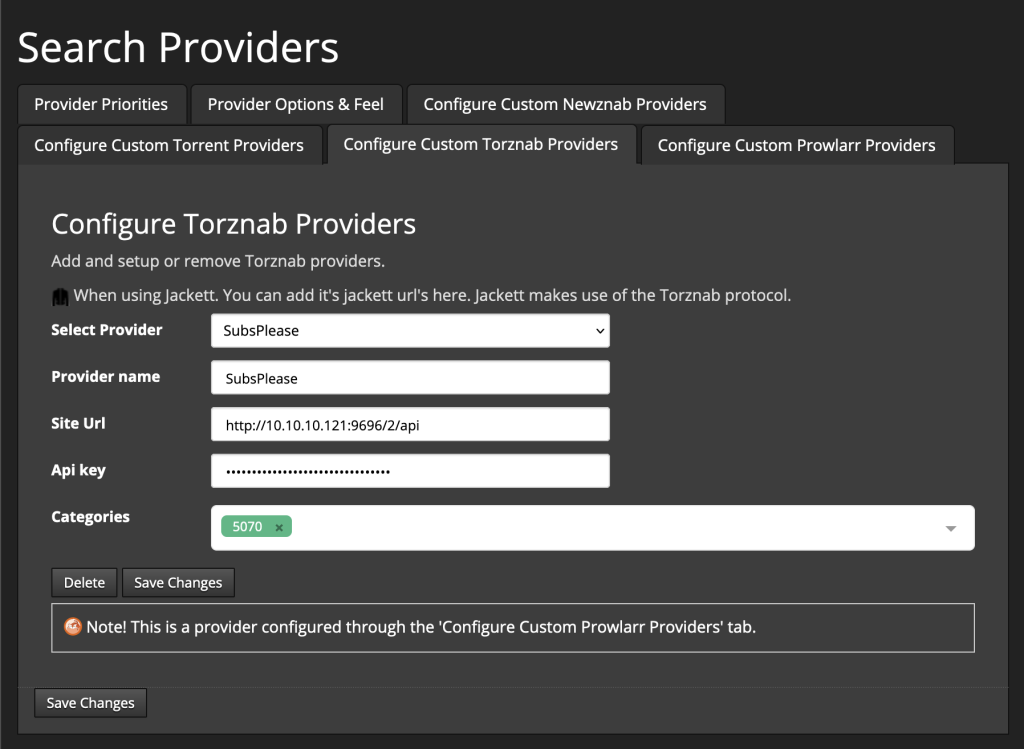
go ahead and do the same for another indexer if you add more than one
don’t forget to click save!
go back and recheck everything after this even If a single thing is misconfigured it will not work
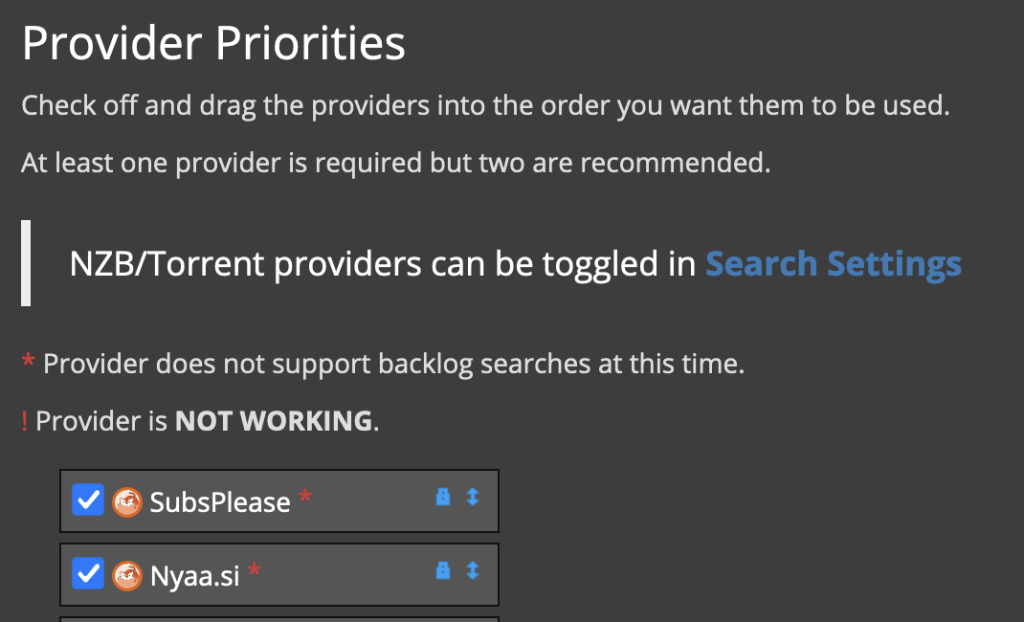
go back to “Provider Priorities” tab and scroll down then check the box on Nyaa and SubsPlease (if you added it to the list) then click save after that it should look like so
EXTRAS: For People who added SubsPlease and use them for weekly release follow this.
fo back to search providers and click on “Provider Options & Feel”, then select SubsPlease and then set it like this
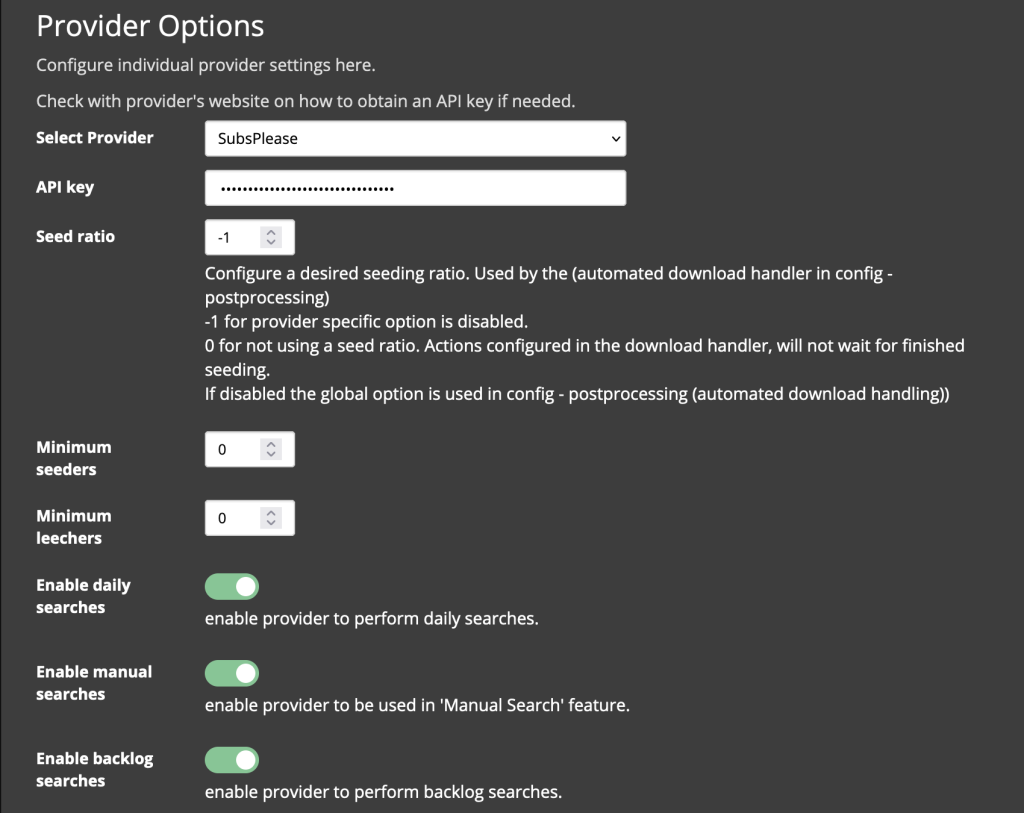
now save and select nyaa from the dropdown and set it like this, then save
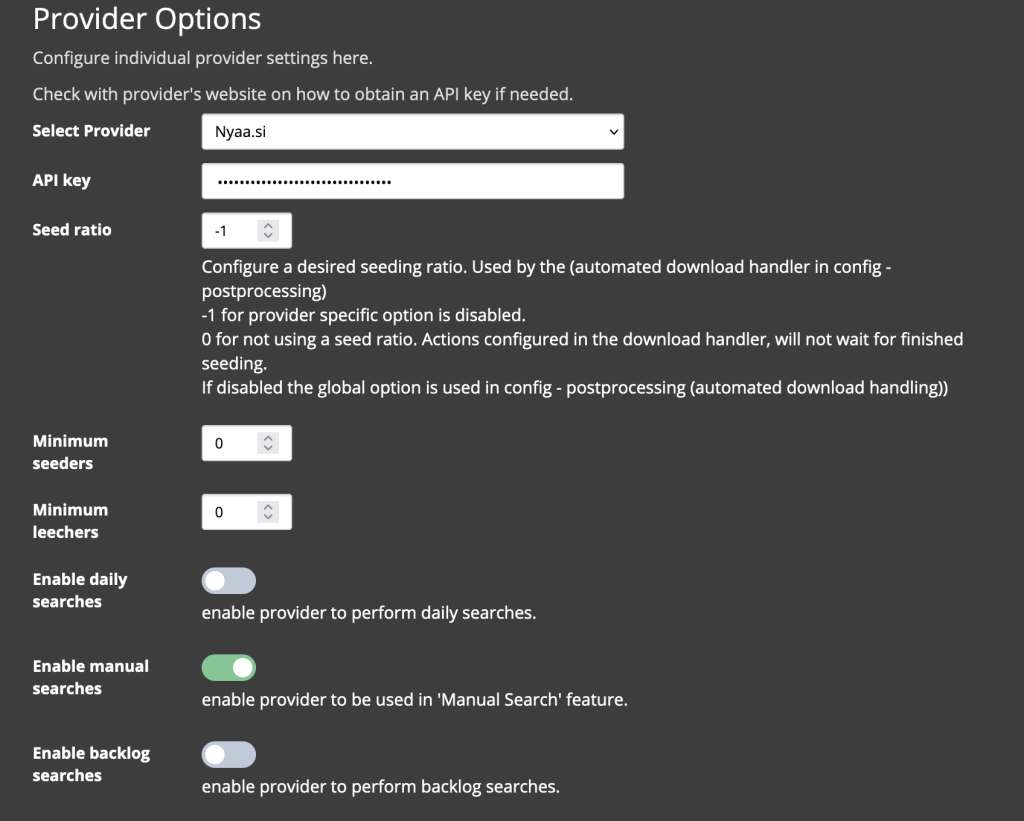
now save it and double check to see if it is correct
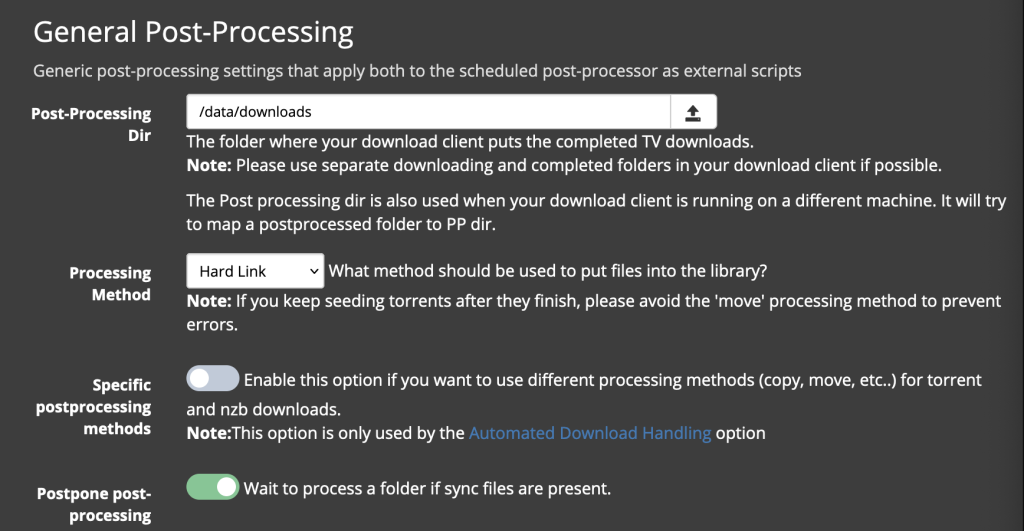
now go to “post-processing” This is where we tell Medusa how to manage episodes
scroll down to “general Post-processing” and for the post-processing dir, select the folder qBittorrent download its files to, for the processing method I set mine to Hardlink if you wanted to process across drive or mounts you have to use move or copy when done, click save
now we’re going to tell it how to name our episode, if you like how medusa do it you can leave it, but I’m going to change it to how I like mine
Season %S/%SN S%0SE%0E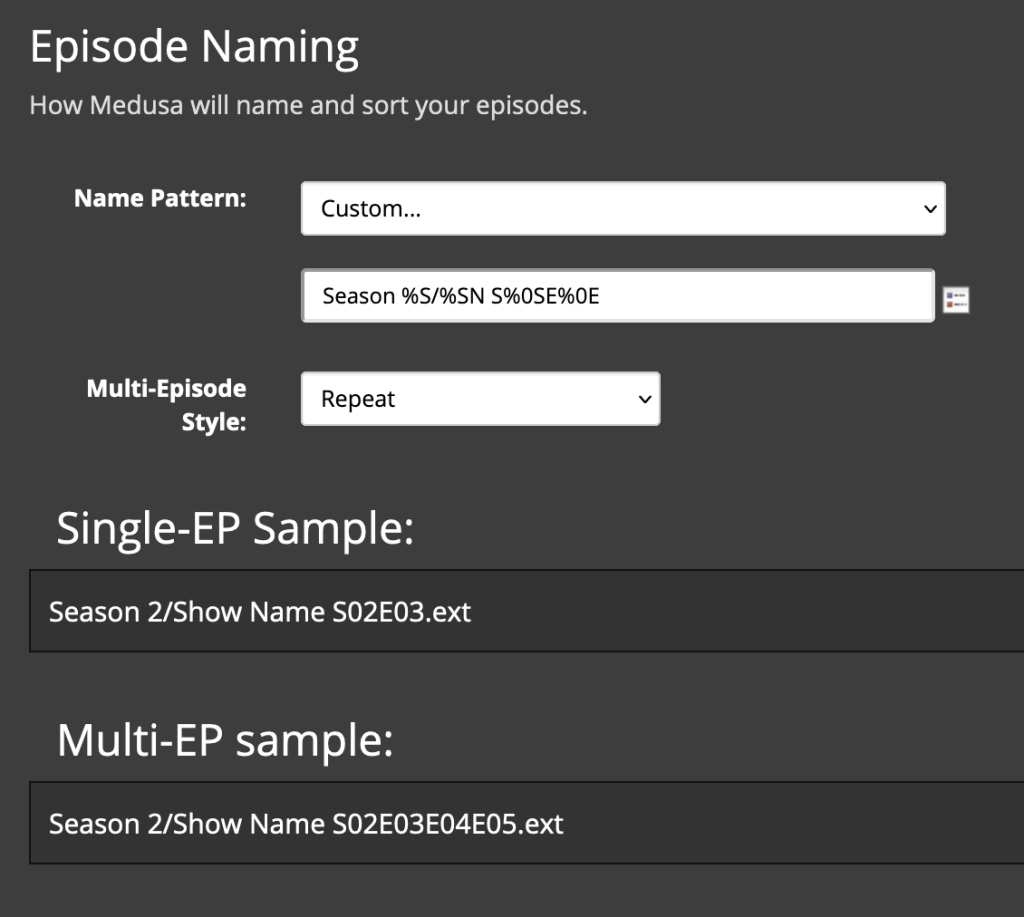
next head over to “Search Settings” and click on torrent search, on “Send .torrent files to” select qBittorrent or any other client you prefer in this tutorial we’re going to use qBittorrent because this is what we set up
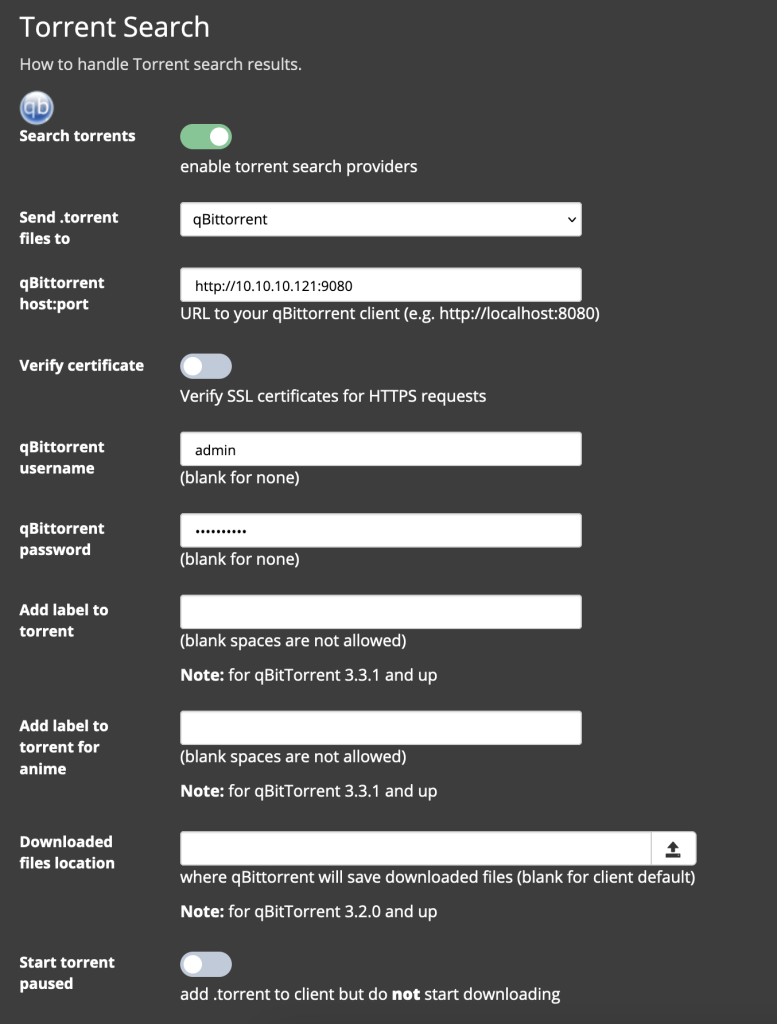
this is what the torrent config should look like, change the IP and port with your info of course, for the file download location you can change it, make sure. you use the path that you have mapped in qbittorrent container, before saving click “test connection” to see if it works first
if it says “Success: Connected and Authenticated” then click save
now if you wanted to setup discord webhook you can do that right now but this tutorial is long enough already so I wont go in-depth about it
next we’re going to make qbittorrent tell medusa when to process the downloaded file
head over to qBittorrent and click on settings go to downloads then “Run External program” check “run external program on torrent finished” check the box and put this in
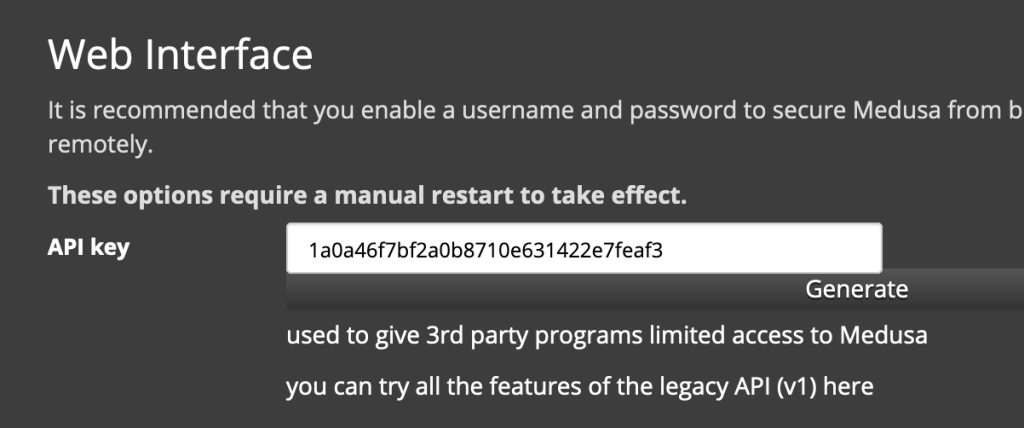
/usr/bin/curl -s "http://<server ip>:<medusa port>/api/v1/<medusa api key>/?cmd=postprocess&path=%2Fdata%2Fdownloads"for the medusa api key head over to “General Configuration” on medusa, click on “interface” then scroll down to “Web Interface” and copy the API Key you see
this is what the qbittorrent config should looks like
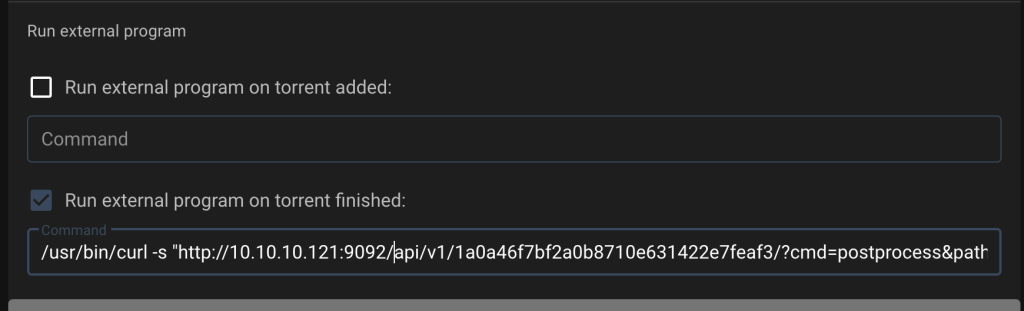
then save the config
VII, TESTING!
now its done, time for testing the work we put together
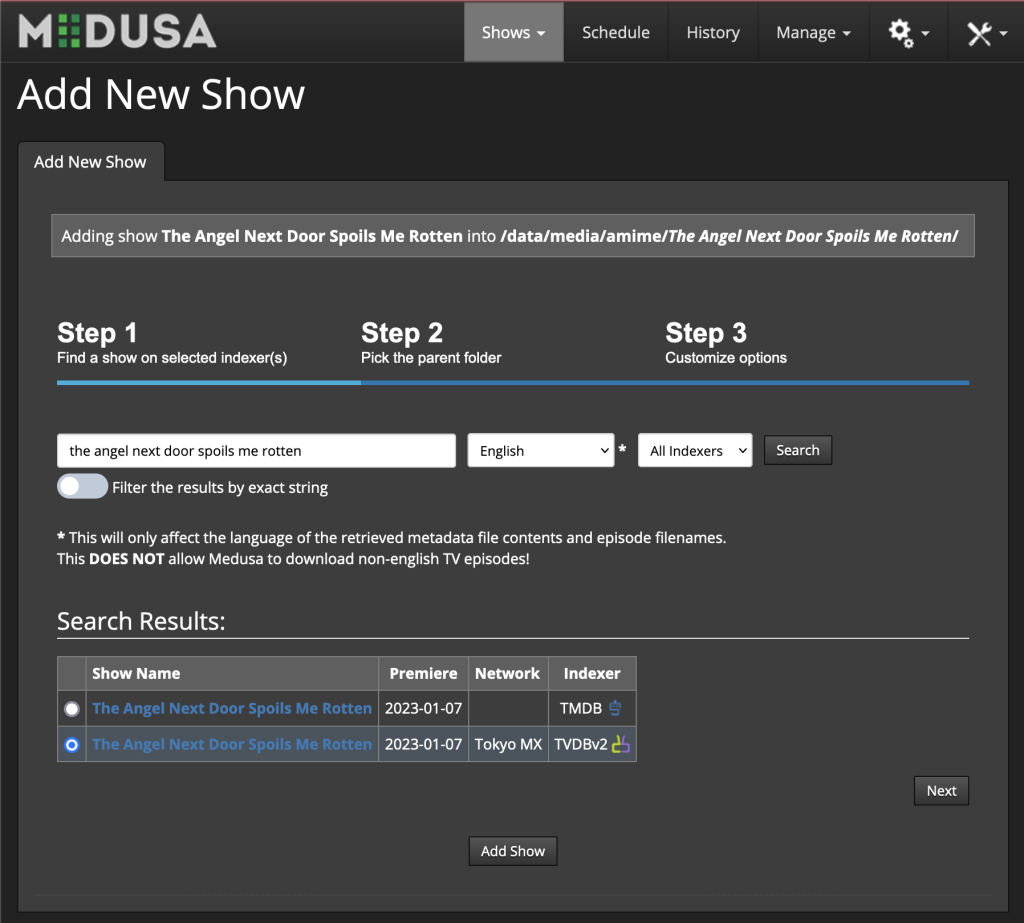
head back to medusa, and click on “shows” and add new show now search it up and hit enter, it should took a while but it will show up, now look at the search results, I recomend using TVDBv2 because it has more info, select which one you want, if you want you can click on the title to check if it is the corrent one, then click next
next select the folder you set earlier and click next
for the quality, it should be what we put in earlier but in case its not select it again, if it is an old show, in this case it is we want to run a backlog search to get old episodes too so for “seatus for aired episode” select “wanted” and check on “this is an anime”, this is what it should looks like
next click “add show” and it will take a while to add it so wait 10 seconds or so it should appear in the home page, now click on the show you added, we will see a page of info, complete with banner and everything, now if the status is “skipped” we have to select it and on the right hand side there is an option you can set, set the status to “wanted” and click “go” it should prompt you to do a backlog click “yes”
you can also try to run a manual search to see what you can find
now log back into jellyfin and you should see the show you added via medUSA, if not go back and recheck if the directory is pointed to the same place, in my case there’s a little typo in the directory name so I just go ahead and fix it and it’s good again and its working perfectly, if you wanted to use Accelrated Encoding you can add a GPU to help jellyfin transcode media you if you have a 6th gen Intel or newer with iGPU you can also use Intel QSV which is quite fast for encoding anime
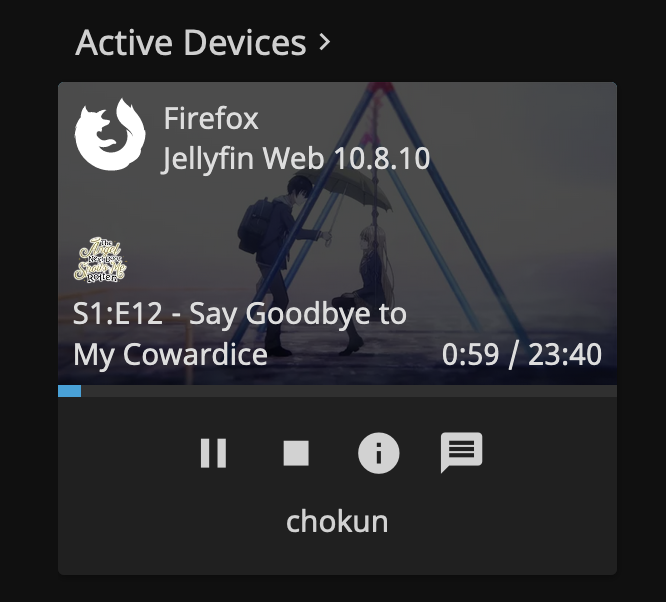
so just try to play somthing in my case its working perfectly
and that’s it, you done it now enjoy your brand new anime downloading/streaming setup
and this tutorial only scratch the surface of this setup, you can use it for much more, have a poke arround, dont only depends on tutorial, have fun and always make backup when you’re not sure what you’re doing!
Leave a Reply